

Hello crafty friends. You may recall that my friend and I ran a craft group last week – we made a variety of cards with strip of paper and I thought I’d share one of the techniques with you today. I first saw this design on Pinterest and then spent a little while figuring out the best way to do it – it’s very easy once you get your head round it. This card is inspired by the current grid at TicTacToe challenge – I’ve taken the diagonal from top left (birthday, free, white on white) and added in embossing to the free square.

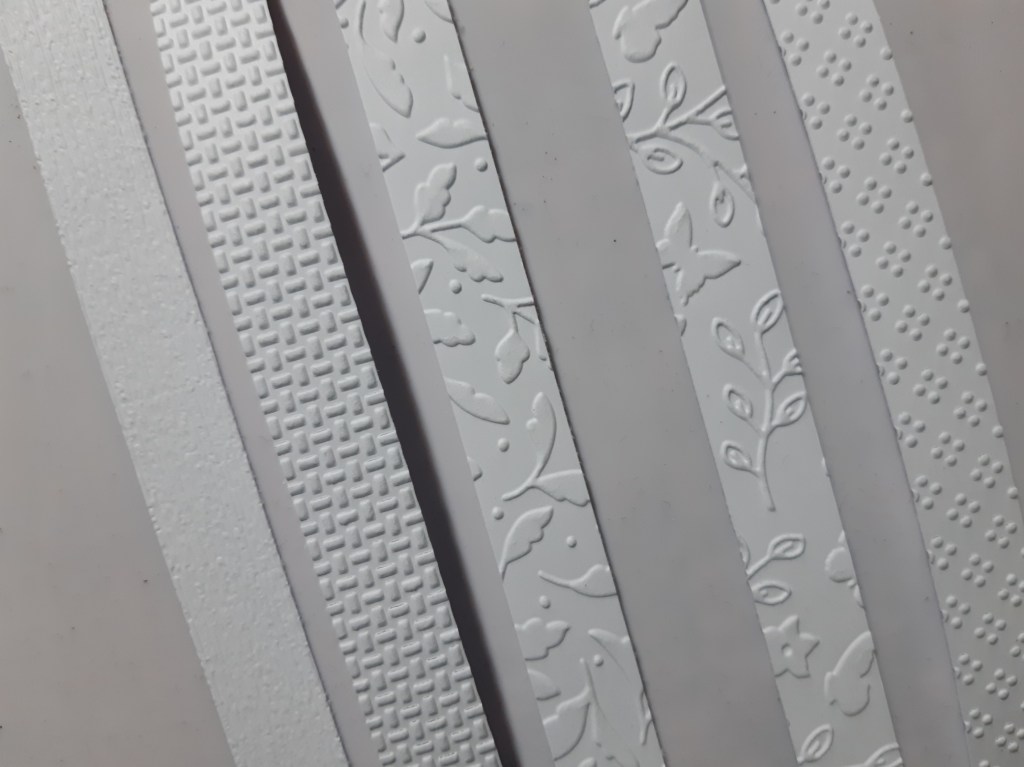
I started by embossing several 1.5cm (or half an inch) strips of white card using five Stampin’ Up! folders – the two mini one from ‘meadow moments’, the two minis from ‘wrapped in texture’ and the ‘subtle textures’ 3D folder.
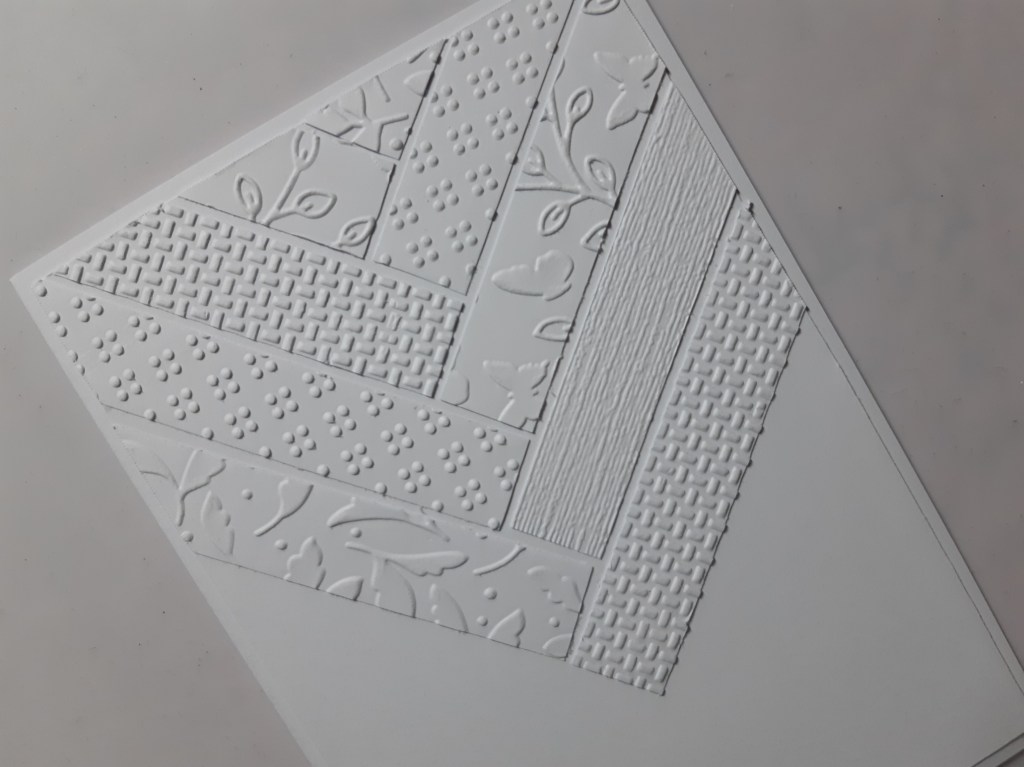
I trimmed down a piece of white card to fit an A6 card blank and then laid the paper strips onto it, so that they sat at angles from each other. The trick here is to get the bottom point of the first strip in the centre of the card, and then work the others up from that. Once happy with the layout of the pieces I stuck each of them down, starting with the bottom one.

Once they were all anchored I used scissors to trim them level with the edge of the backing card. I carried on filling in with strips to the top of the card, again trimming them all off flush with the backing card. I then attached the whole piece to the card blank.
The final step was to add the sentiment – this one is from SU’s ‘pansy patch’ which I stamped in ‘bluebird’ Archival ink.
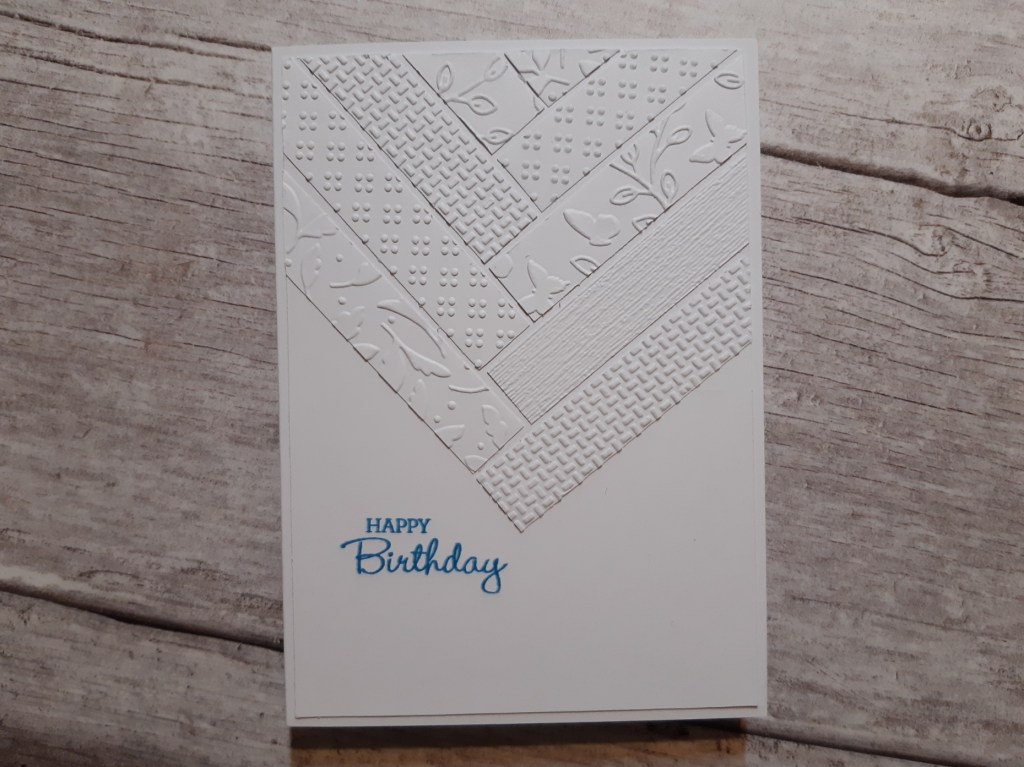
Thanks for dropping in. This is a great design to use up scraps of paper – you just need five co-ordinating strips. It works for any occasion.
Discover more from Deborah's Crafty Blog
Subscribe to get the latest posts sent to your email.

Love it! Super cards, Deb.
>
LikeLiked by 1 person
Thanks Jolanda xx
LikeLike
Love this idea! May have to try it!
LikeLiked by 1 person
What a great idea Deborah – love that showcase of embossed strips, so effective white-on-white. Thanks for sharing over at TicTacToe this week!
LikeLiked by 1 person