
Welcome to my crafty blog. I’ve been busy making cards today for friends who have their birthdays this weekend – I can’t believe I left it all to the last minute though! Thank goodness for Julie Hickey’s alphabet dies and birthday stamps, which work so well for both male and female cards.
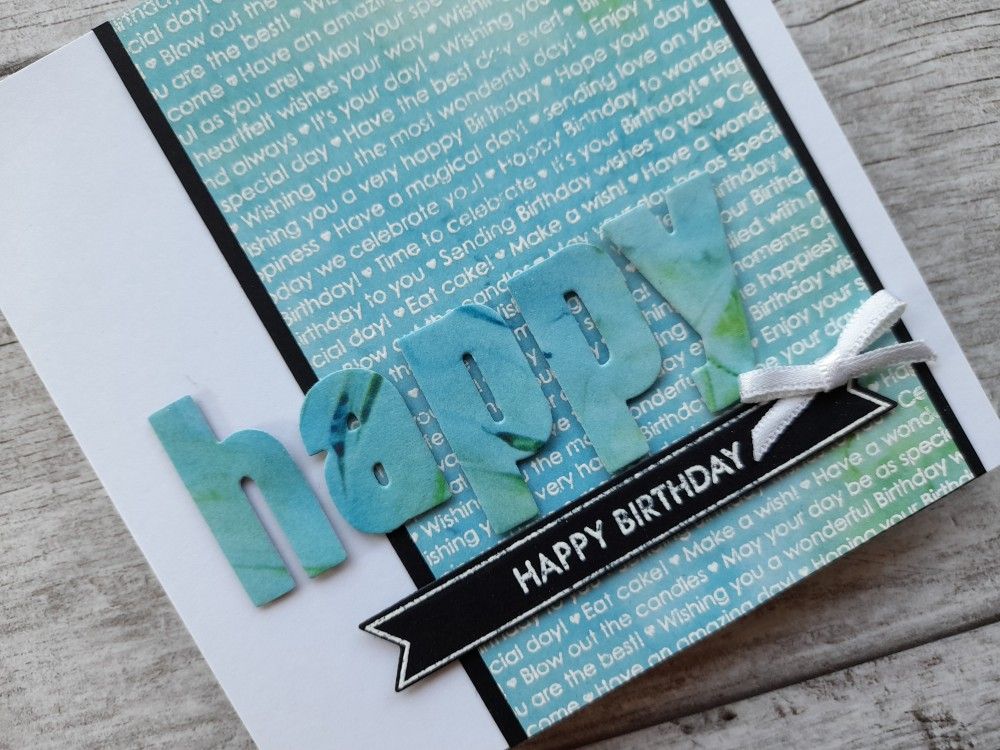
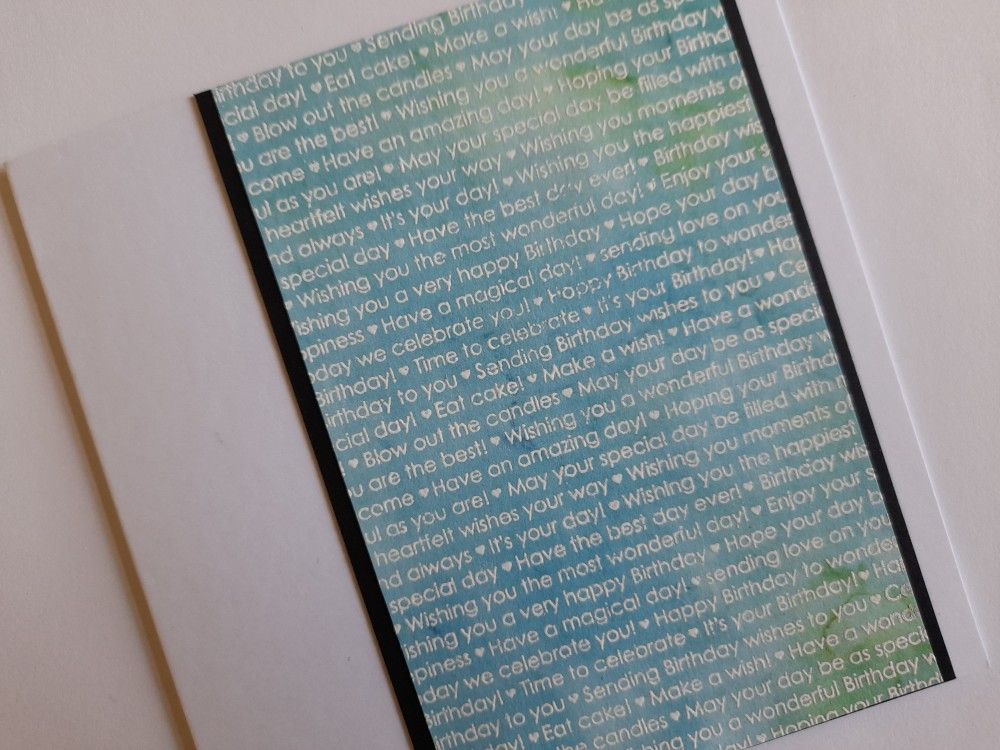
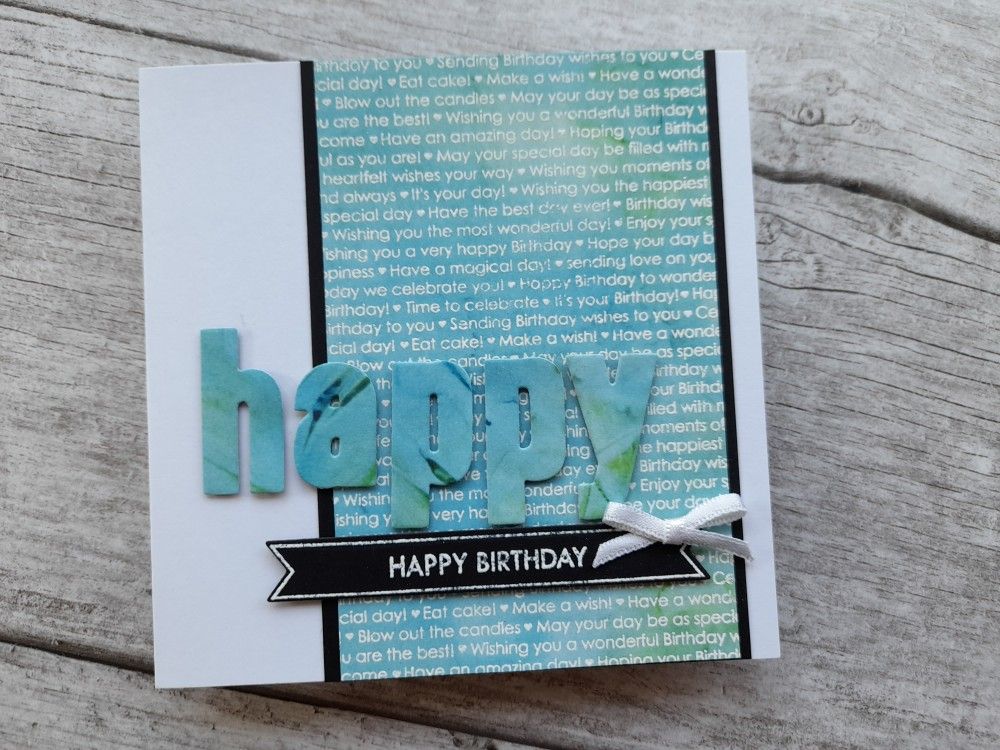
I’ve got two cards to share with you, both using the same basic layout but switching it round a bit for the second one. I started with the first card by stamping Julie’s ‘birthday background’ onto an offcut of Claritystamp designer paper and heat embossing it with WOW superfine bright white powder. You can see the contrast the embossing gives in this photo.

I trimmed the embossed paper down and mounted it on a layer of black card before attaching it to a 5×5 card blank.
I then die cut the letters for ‘happy’ from the leftover designer paper, using Julie Hickey’s ‘alphabet’ dies. This is such a great way to use up scraps. I stamped one of Julie’s ‘birthday messages’ onto a strip of black card and heat embossed it in white before cutting it out with the coordinating die. They all then went onto the front of the card using foam pads.
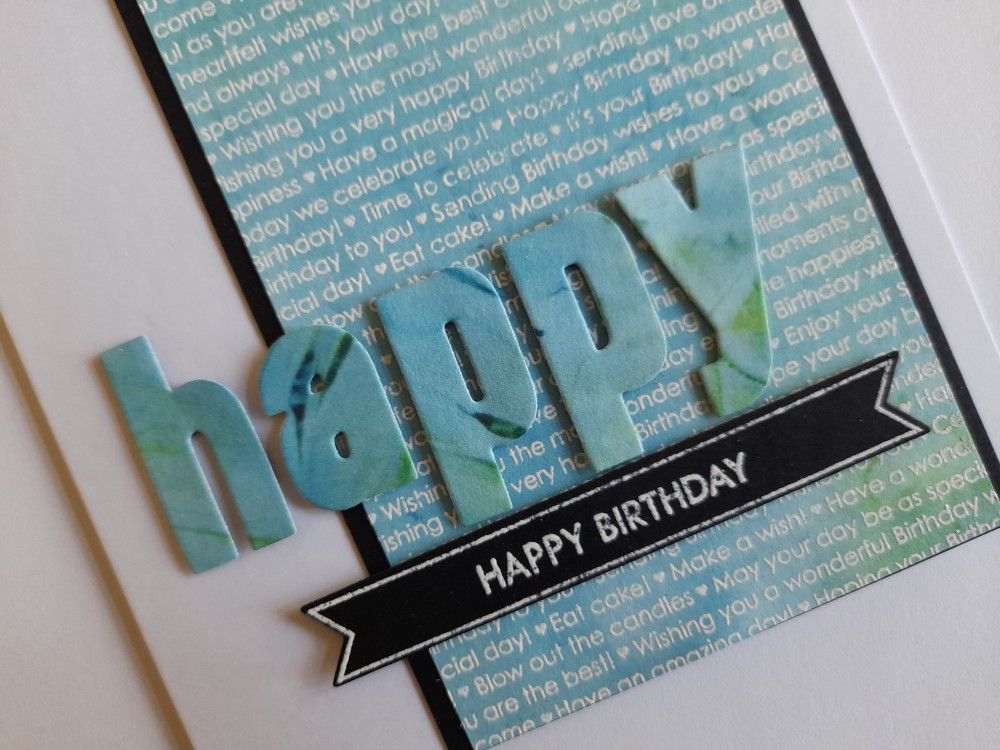
I finished by adding a white ribbon bow at the edge of the sentiment, which meant I’d picked up all the elements in this week’s recipe challenge over at As You See It – birthday, heat embossing, patterned paper, die cut & ribbon.

For the second card, I used the same basic elements, but reversed the layout. I cut a square of black card to fit on a 6×6 card blank, and added a strip of football patterned paper on the left half of the card. I die cut the letters, this time in white card, and then blended Distress Oxides onto them to give me the colours I wanted.

Now these are very specific colours, as the recipient of this card is a football fan and supports West Ham United, so I needed the letter to be in claret and blue. The blue was easy (broken china), but I had to blend both ‘wilted violet’ and ‘festive berries’ onto the card to get something approaching the right shade of maroon. Once dry, I also attached them and the ‘birthday message’ die cut to the card using foam pads.
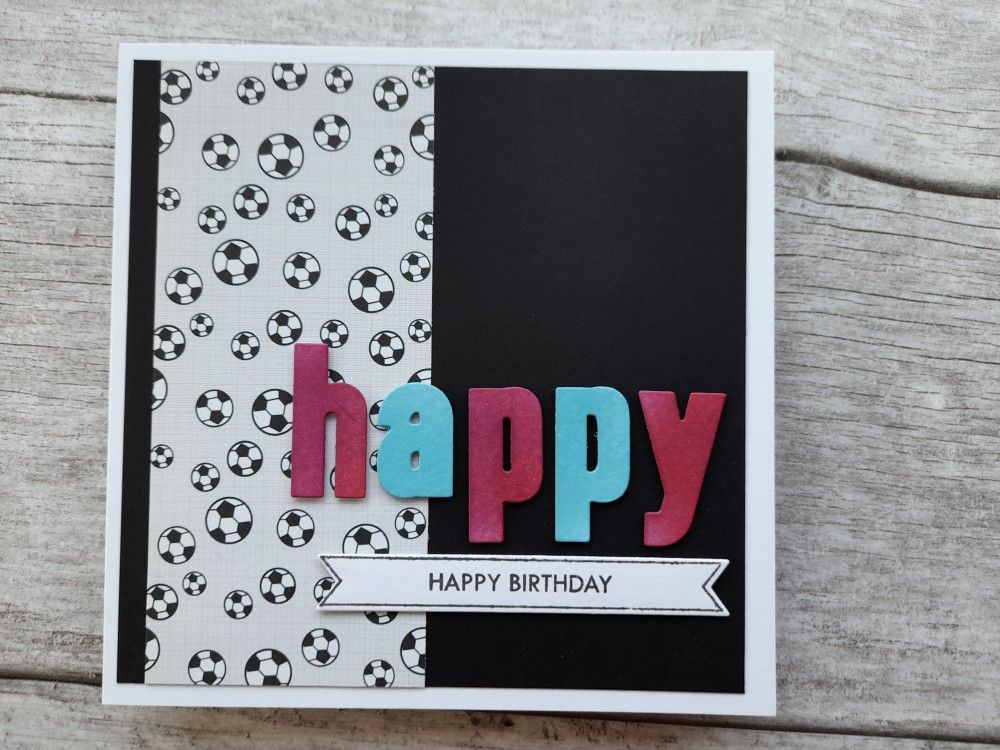
Now I hope I’m not pushing my luck too far here, but I’m sharing this card over with Just Us Girls. Their theme this week is ‘spots or dots’ and I think those bouncing footballs definitely fit the bill – what do you think?

Discover more from Deborah's Crafty Blog
Subscribe to get the latest posts sent to your email.

Great cards! I, too, have left several for the ‘last minute’ and it’s gets rather stressful, doesn’t it?!
LikeLiked by 1 person
It does! and it’s crazy when I’m regularly making cards – no excuse really!
LikeLiked by 1 person
I love how you’ve heat embossed onto dsp like this! It truly is a great stamp and die set. Love what you’ve done with our recipe. Thanks for playing with us again at AYSI.
LikeLiked by 1 person
Sweet dots on your adorable card! Thanks for sharing at JUGS!
LikeLiked by 1 person
These are both fabulous! LOVE the big sentiments and the way you created your backgrounds! Thanks for playing with our As You See It recipe challenge!
LikeLiked by 1 person
Love both of these Deborah – a great way to change up the same layout by varying the papers but retaining the big sentiment. Thanks for playing along over at As You See It in our current recipe challenge!
LikeLiked by 1 person
Deborah, I love the embossed birthday sentiments onto that great background paper and then the way you used the same patterned paper for the die cut letters! It looks so fantastic when you pop it with the black background and label! Thanks for testing our recipe at As You See It Challenges!
LikeLiked by 1 person