
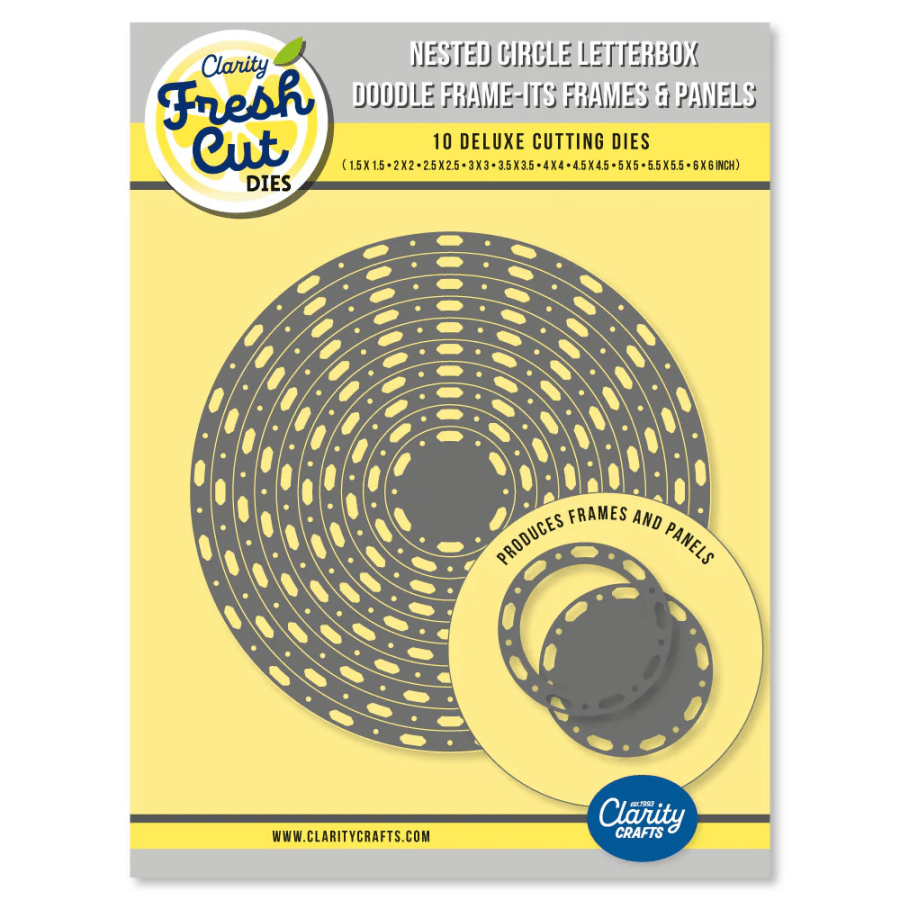
Hello crafty friends. It’s all getting a bit busy here this week with various work and crafting commitments, but I found a bit of time this afternoon to make a couple of cards using Clarity’s nested circle letterbox doodle frame-it panel dies. I was looking at my stash while watching Paul showcasing the whole collection of these fab dies this afternoon (find the video here) and realised that this particular set had never been out of their packaging! Time to put that right, I thought…
As usual, I’ve incorporated a few challenges into this one, picking up the rainbow option from Colorful Options and the birthday themes from Inkspirational and Seize the Birthday.

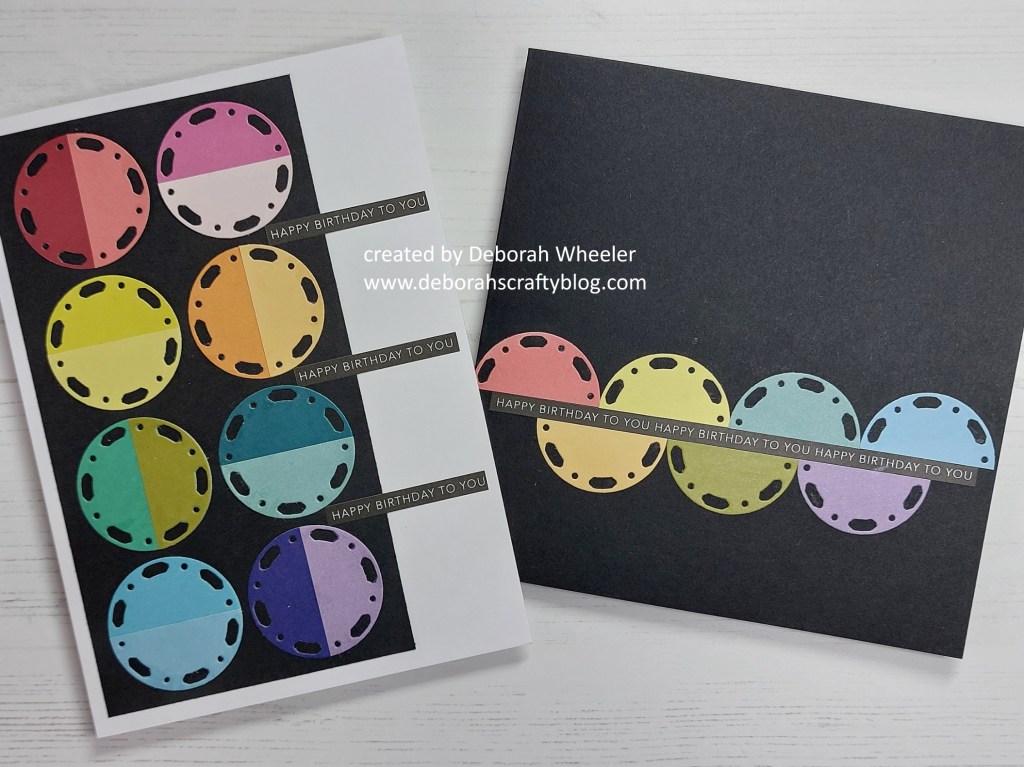
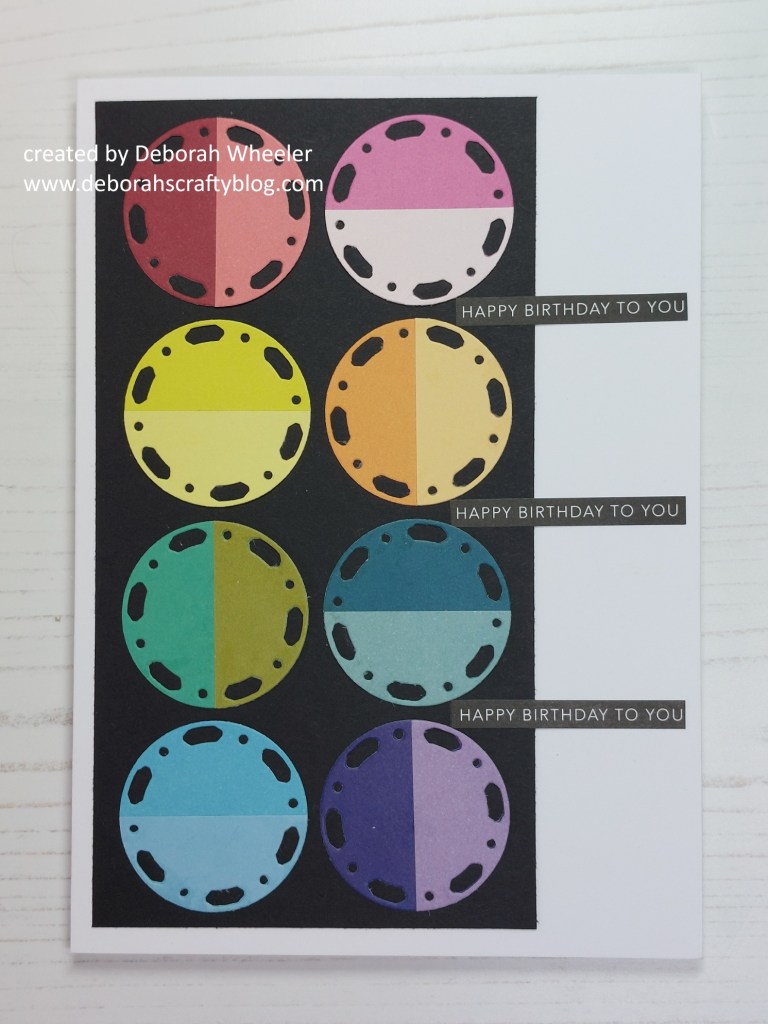
I’d seen a few cards with this style of layout on Pinterest, so went with my interpretation of them. I cut eight co-ordinating pairs of circles with the smallest of the panel dies – it’s a great way to use up some of those scrap pieces. I then cut one of the circles from each pair in half with my guillotine, and glued the semi-circle onto the full one using Pritt stick.

I lined them all up, rotating their positions, and glued them onto a panel of black card, using a ruler along each edge to get them evenly spaced. The topper went onto a 5×7 card blank, offset to the left. I was struggling to find a sentiment that worked, then remembered the long narrow one in the Birthday & Christmas sticker set – the words are repeated three times, so it was a simple matter to cut it into three sections and sit them between the circles.
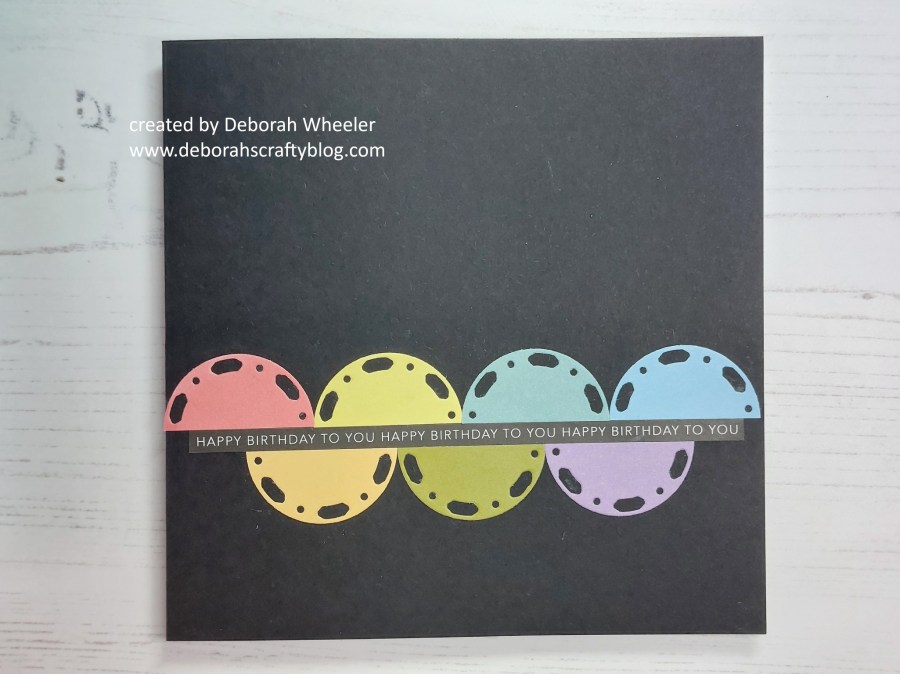
And I still had the leftover semicircle pieces to use. This time I used the second one of the long stickers in the set and sat it across the front of a black 6×6 card blank. All I then needed to do was line the half circles up so they flowed in and out of each other.
These dies are great for putting borders and frames on your creations, but they work so well on their own too – and no new pieces of paper were harmed during the making of these cards!
Discover more from Deborah's Crafty Blog
Subscribe to get the latest posts sent to your email.

Seriously impressed. These are amazing.
LikeLiked by 1 person
Thanks so much! It was pretty easy to do x
LikeLiked by 1 person
beautiful! I especially love the split circle border
LikeLiked by 1 person
Thank you JoAnn – it did work out well x
LikeLike
Very cool! I’ve seen this done with plain round die cuts but have never tried it.
LikeLiked by 1 person
It was really easy. I think having the border on the dies was useful, as I could line them up accurately to halve them with my guillotine x
LikeLiked by 1 person
Look at you making a die-cut card! LOL I think the fact that these circles have the holes in them really make this work so well. I really like these, Deborah! Thanks for playing at Seize the Birthday!
LikeLiked by 1 person
Thanks so much Nancy – definitely a step out of my usual groove!
LikeLike
Really love both of these cards. Those dies are really cool and the rainbow on black is fantastic. Great sentiments too. Thanks for joining us at Seize the Birthday.
LikeLiked by 1 person
Really eye-catching cards! The colours really pop on the black background. Thanks for playing along with us at Seize The Birthday.
LikeLiked by 1 person
wow – what an interesting set of circle dies, Deborah! Your design is so pretty with the mix of colors and half circles! Thanks for sharing with us at Inkspirational: Birthday!
LikeLiked by 1 person
Another fun card – love the colours you chose – and of course the design is fabulous xx
LikeLiked by 1 person
thanks so much x
LikeLike
[…] French Lace Midi Groovi PlateClarity Rub On Transfers Deborah Wheeler(Step-by-step blog exists HERE)Nested Circle Letterbox Doodle Frame-its Frames & Panels Die SetBirthday & Christmas […]
LikeLiked by 1 person
I like you that made every circle two-toned for a colorful yet clean feel. It’s a design perefct for a man or woman equally, I like that about a card. Thanks for sharing with us at Inkspirational!
LikeLiked by 1 person