
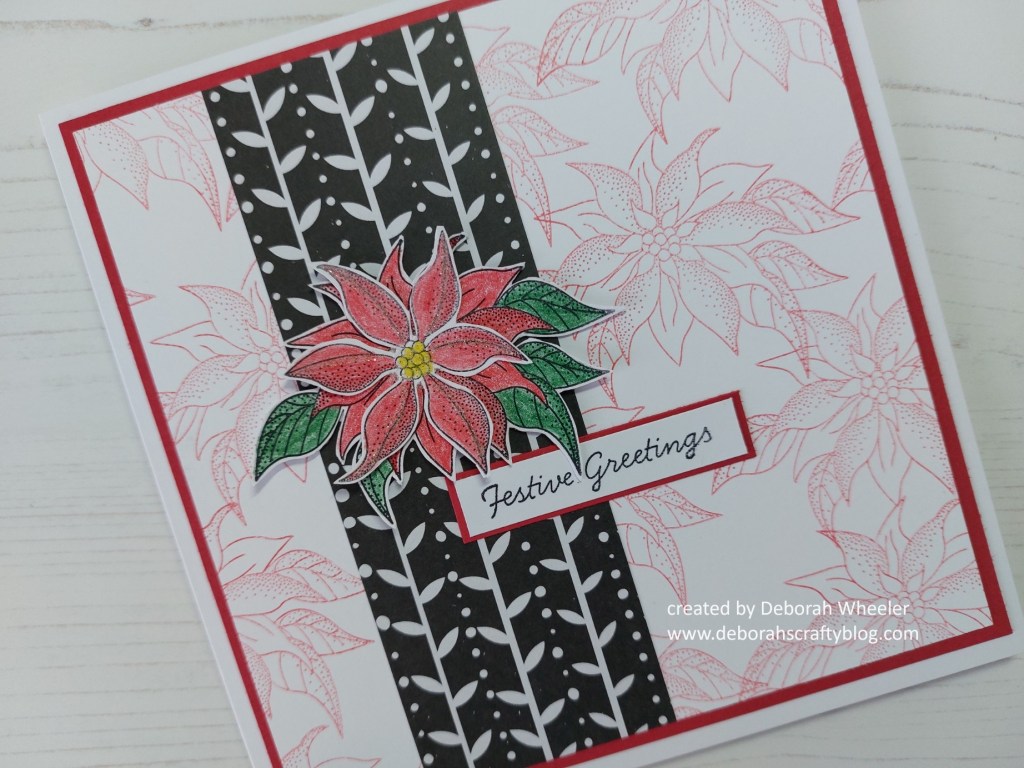
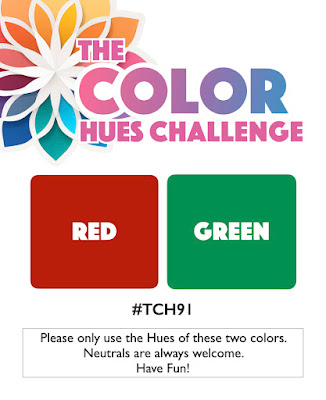
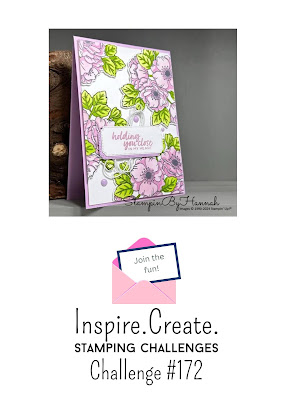
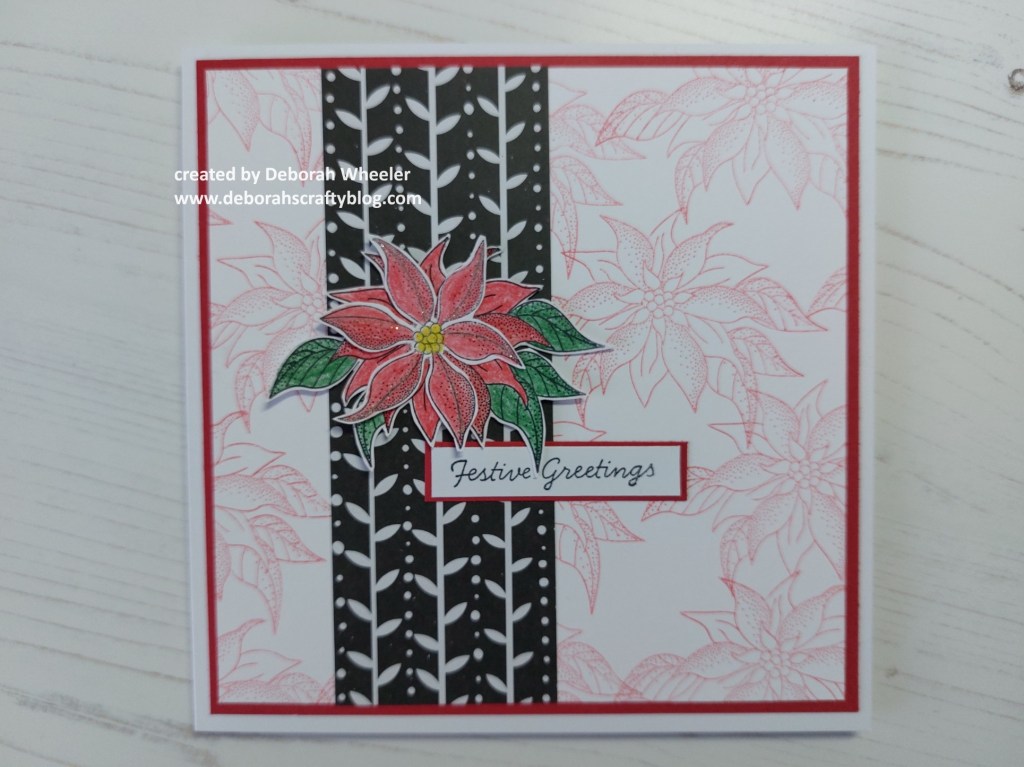
Hello there! I’m back with another of the cards I demo’d on Saturday’s shows, this time using the ‘elegant poinsettia’ set from ClarityCrafts. Although at first glance this looks like a pretty standard card, I pushed myself out of my usual comfort zone as I used a gel press plate to create the background! I’ve pulled a few current challenges together in this card as well – Color Hues for the red & green combination, Inspire.Create where I picked up the repeat stamping on the background, and Inspired by for their three panel layout.

So, let’s start with the background, which actually gave me two from the one process. I used my 6×6 gel press plate, squidged some ‘festive berries’ Distress Oxide onto it and smoothed it out with my brayer. (You can roll the spare ink off your brayer onto a piece of stencil card and you’ve got the beginnings of another background as well – no point wasting it!) I then took the largest poinsettia stamp, lightly pressed it into the gel plate to lift the ink and then stamped it onto another piece of stencil card. I carried on doing this across the gel plate, filling the stencil card – I find it easiest to stamp on the card in the equivalent spot to where I lifted the ink from the gel plate, that way you can (hopefully) keep track of where you’ve been! Having worked my way across the gel plate & filled the stencil card, I then pulled the print from the plate onto another piece of card. The pattern you get shows where you lifted all the ink off the gel plate (in the second photo below) – it’s basically the negative of the stamped background.
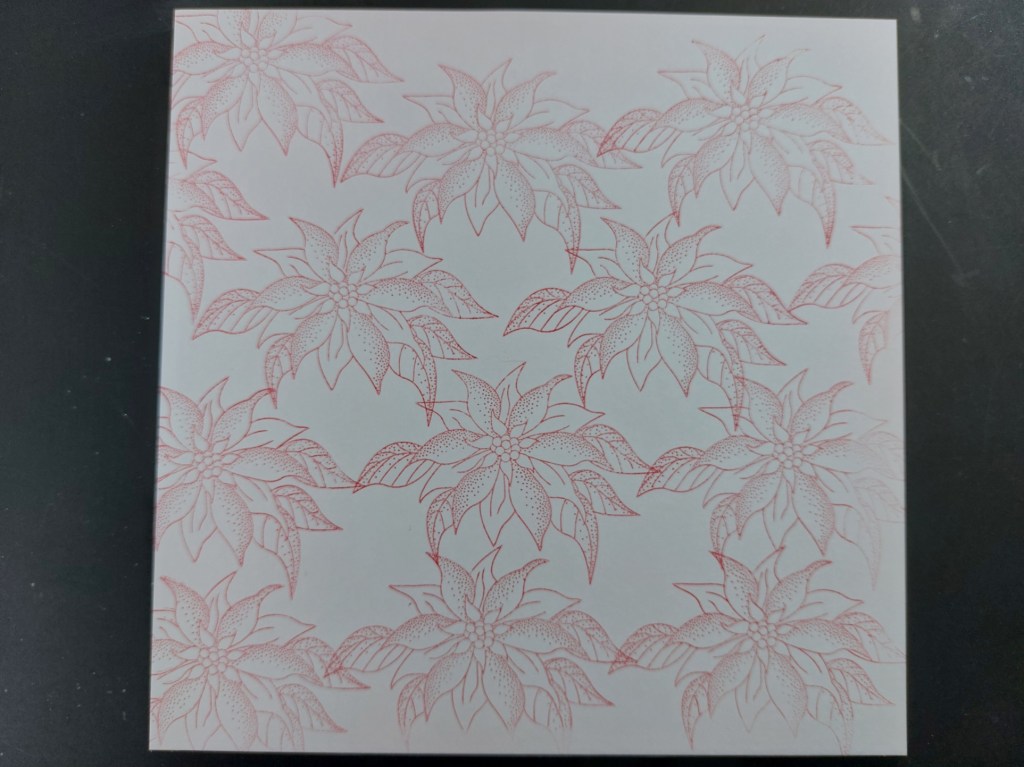

So, for now, I’m working with the stamped background – the gel plate print will feature on another day… I trimmed it down, added a mount of red card and attached a strip of the BOW-WOB (black-on-white, white-on-black) collage paper down the front.

I then stamped the largest and middle poinsettia images onto some scrap card, coloured them with Pergaliner pencils (red for the bracts, green for the leaves, and lime green for the centre) and fussy cut them

I then simply layered them together and glued them to the card front, adding the sentiment as well. The finishing touch was to run a Quickie glue pen down the centre of the bracts and in the middle of the poinsettia and shake some Pergalitter over it (I went with ‘hint of green’). I left this til last, so I could leave the card to one side whilst the glue then dried.
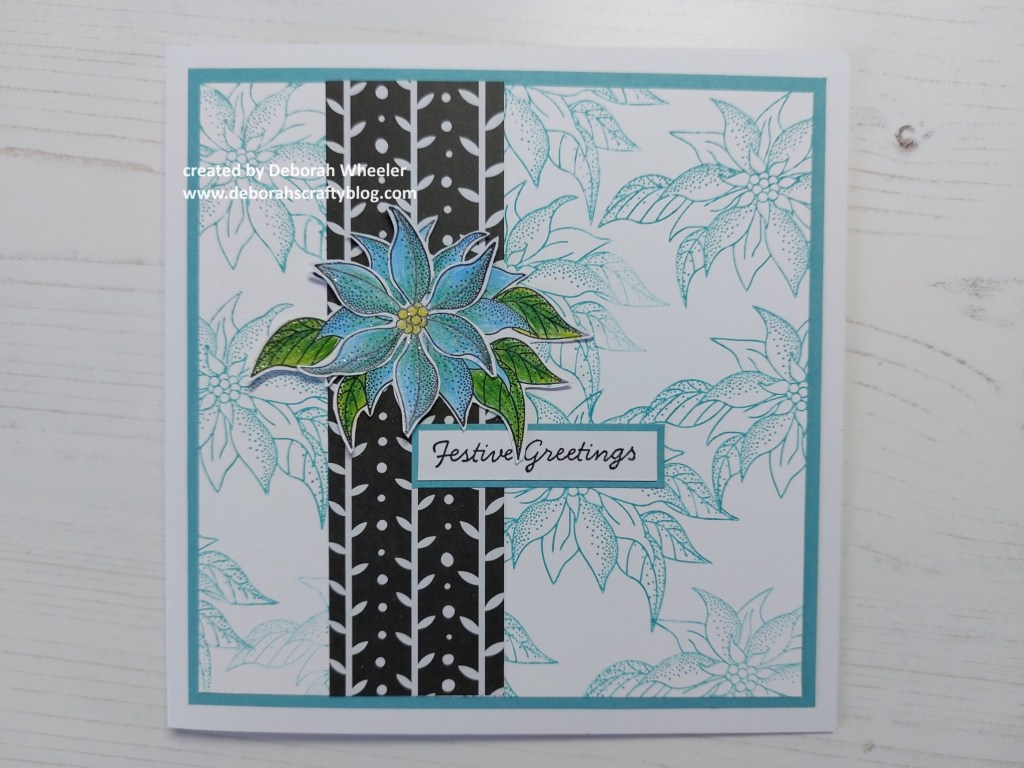
I went with a different colourway when I demo’d this on Saturday – I do love the turquoise! I have to say, these gel plate backgrounds are quite an addictive process too – I’ve now got several sitting in my stash just waiting for a card!
Discover more from Deborah's Crafty Blog
Subscribe to get the latest posts sent to your email.

I love how you did your background and then the main image. Adding the black and white piece really sets it all off.
LikeLiked by 1 person
Thank you – I was really pleased with this one!
LikeLiked by 1 person
You should be.
LikeLiked by 1 person
So pretty! Looks like a fun technique! It’s been literally years since I’ve played with my gel plate. In face, I probably should find it to make sure it hasn’t dried up! Bahahaha! Not sure if that’s a concern or not but it did make me chuckle! 😉
LikeLiked by 1 person
I must admit, paint on a gel plate scares me, but I can cope with inks!!
LikeLiked by 1 person
I’m so happy you explained your background technique! I’m adding it to my “must try” list. Beautiful holiday card for our challenge. Thanks so much for playing with Color Hues!
LikeLiked by 1 person
Thank you!
LikeLike
I love your Christmas card in colors of red and green, but then I saw the blue one too and it’s just as lovely! So happy to see you in our gallery at Color Hues.
LikeLiked by 1 person
Thank you Nancy x
LikeLiked by 1 person
Both are beautiful, Deborah, but my love for non-trad colors for Christmas gives the blue the edge for me xoxo
LikeLiked by 1 person
I must admit, I’m very partial to the blue one too!
LikeLike
[…] of the box. (if you need a reminder of how I got the print, it’s in yesterday’s post here). This is the point to add any other decoration to the background if you want it, but I forgot to […]
LikeLike
Such a pretty card Deborah. I am very intrigued by the gel plate process. It made a beautiful background for your poinsettia centerpiece. Thanks for sharing your card with us at Inspire.Create.Challenges.
LikeLiked by 1 person
Elegant poinsettia indeed! Your card is gorgeous – and what a fabulous technique you’ve used for your background. Thank you for joining us at Colour Hues.
~carol
LikeLiked by 1 person
Loved this one when I saw you on the tv , I havn’t used my gel plate for ages, so dug it out and made a lovely card, thank you
LikeLiked by 1 person
Thanks so much Sue x
LikeLike