
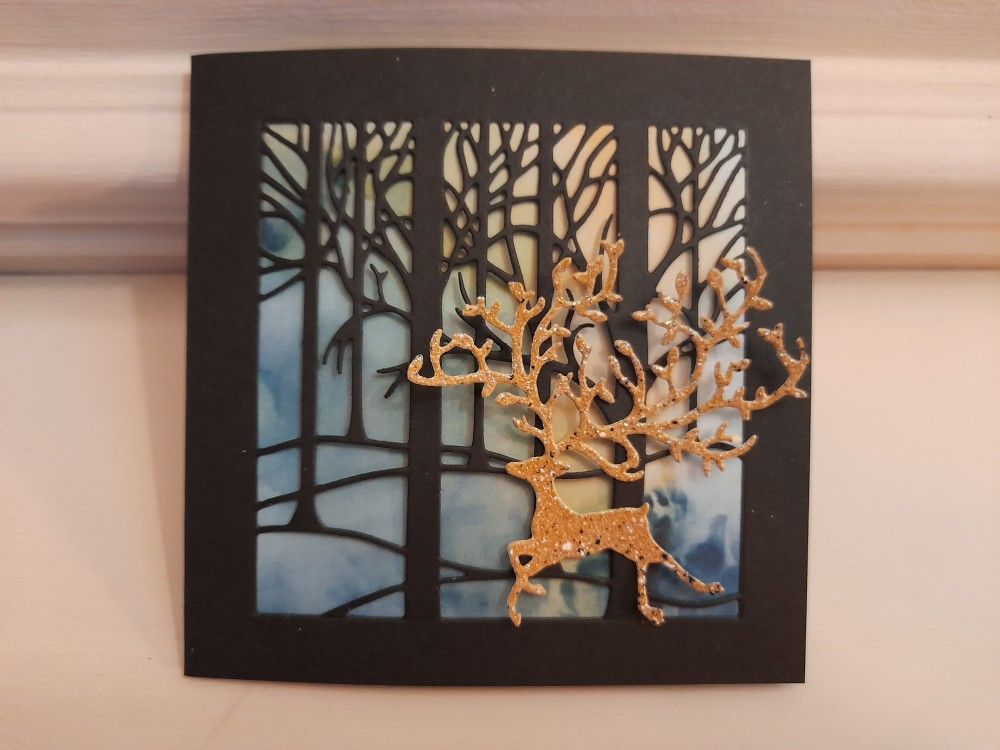
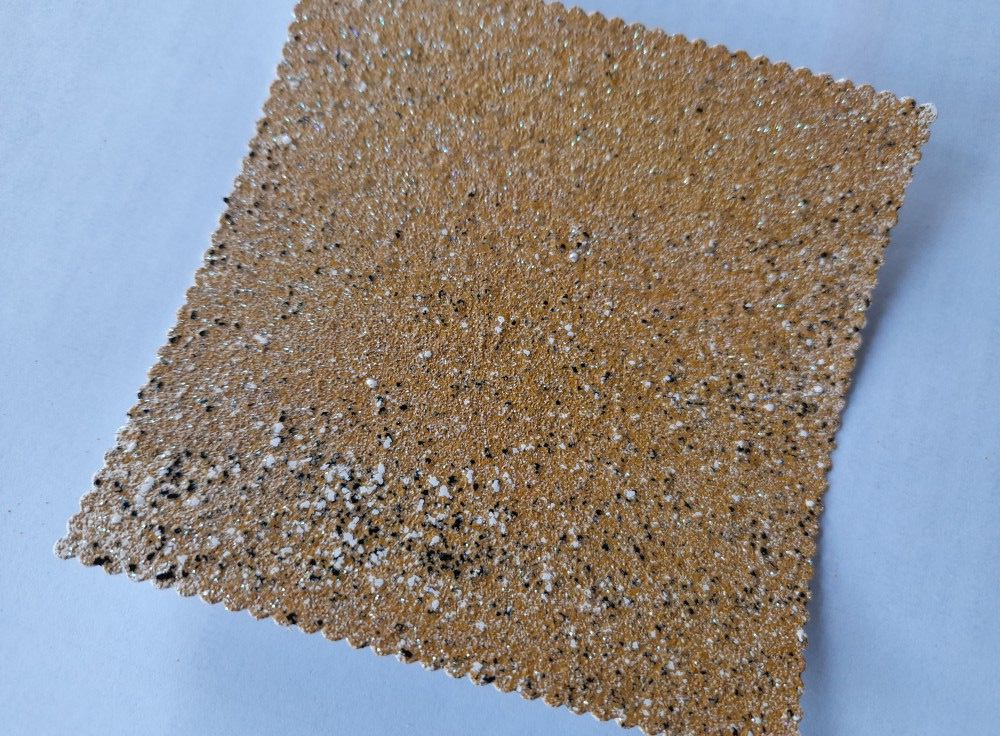
Welcome to my crafty blog. I was inspired today to play with some of my WOW embossing powders, after waiting Marion Emberson on Hochanda, and used them to make some card for this beautiful stag, which is the October die from the Claritystamp New Design Club. I didn’t want him to just be a plain gold, and then remembered the ‘Riviera Trio’ of powders that I bought earlier this year. This colour is ‘Provencal’, which is a dark gold with flecks of black and white texture powder in it.

I started by covering a square of card with WOW embossing ink, and then adding the Provencal powder and heated it. It actually took a couple of goes to get the card covered as much as I wanted – the larger black and white flecks weren’t evenly scattered on the first addition. I know this photo makes it look like sandpaper, but it is really sparkly!
Once it was embossed, I cut the stag out of the sparkly card, using the New Design Club die. At this point, my inner crafter was shouting ‘don’t waste any of it!’, so I used the great technique from Clarity’s Barbara Gray to ‘trap the scrap’. She has some brilliant YouTube videos on how to do this, but essentially you keep everything in the die until you’ve tuned it over, and then carefully lift the main image away, leaving all the scrap bits in place in the die, but more on this later
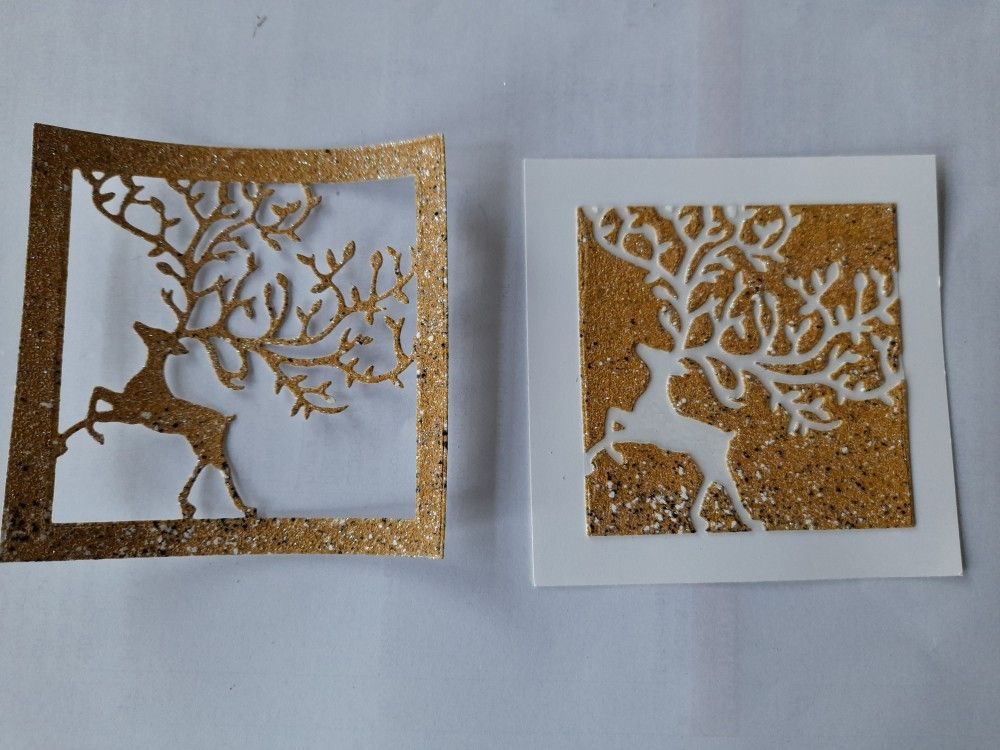
That gave me the two stags from one die cut, which is a great way of not wasting any card. I was going to keep the main die cut in the frame, but then decided that he’d look really good in a forest of trees. So I got out another Clarity die, the ‘Treescape’, cut that into the front of a black 5×5 card blank and then popped a piece of designer paper from their ‘Antarctica’ pack behind it. I then trimmed the stag out of the frame, just using scissors to snip away at all the bits where he joined, and added him to the front of the card.
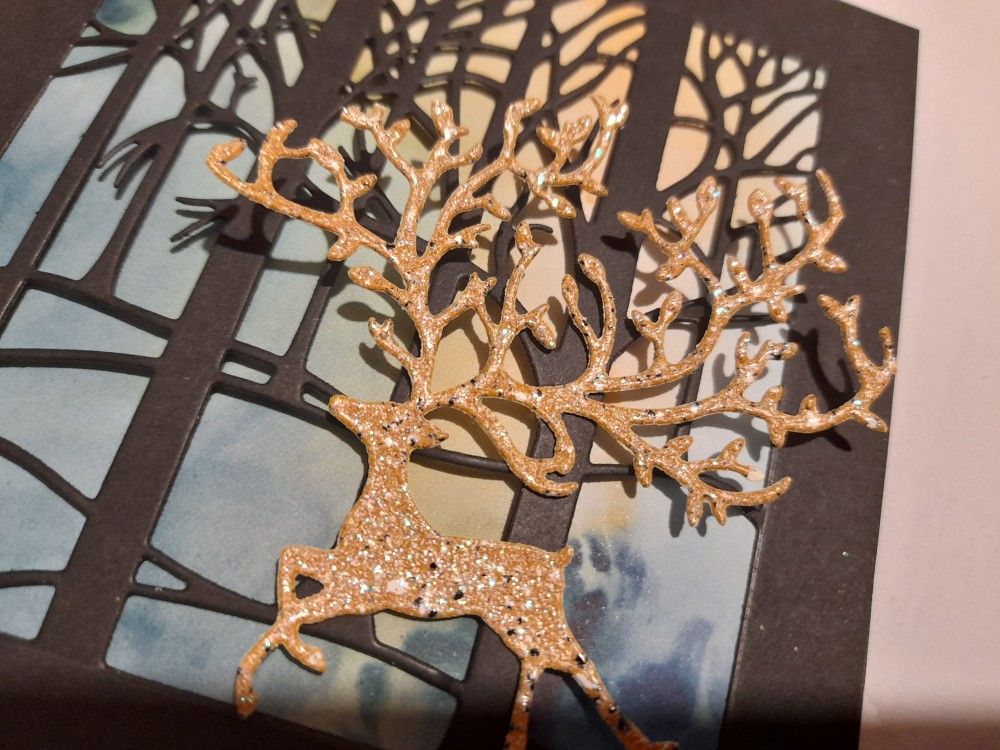
I just attached him with glue behind his body and at a couple of points on his antlers, as I wanted them to stand up a bit from the card front. I love the way the light seems to be coming through the trees from the paper behind him.
Now you’ll be wondering what I did with the other part of the die cut, but this was turning into a very long blog, so check back shortly for part 2!
Discover more from Deborah's Crafty Blog
Subscribe to get the latest posts sent to your email.

This is so pretty – love the depth of the background.
LikeLiked by 1 person
OMGosh, this is gorgeous! That background is phenomenal and really makes the stag pop!
LikeLiked by 1 person
[…] This is another die that I used for a 2019 Christmas card (I’m getting better at this). here’s the link to my post with the details: Christmas stag (part 1) […]
LikeLike